Artificial grass is a smart choice for gardens, balconies, and outdoor spaces. It stays green all year, requires minimal maintenance, and can be used in any weather. Installing artificial grass saves water, reduces mowing, and keeps your outdoor space neat. Choosing the right fake grass for the garden makes it look natural and last longer. In this guide, you will learn step by step how to install artificial grass and the key steps for a smooth, long-lasting finish.
Why Artificial Grass Matters
Artificial grass is well-suited for areas where natural grass struggles to grow. It is ideal for gardens, patios, balconies, and even rooftops. Using fake grass for a garden can transform small or shady spots, giving a fresh, green look with minimal effort.
Step-by-Step: Artificial Grass Installation
This guide shows you exactly how to lay artificial grass yourself for a neat, natural, and long-lasting garden.
Tools and Materials You Will Need
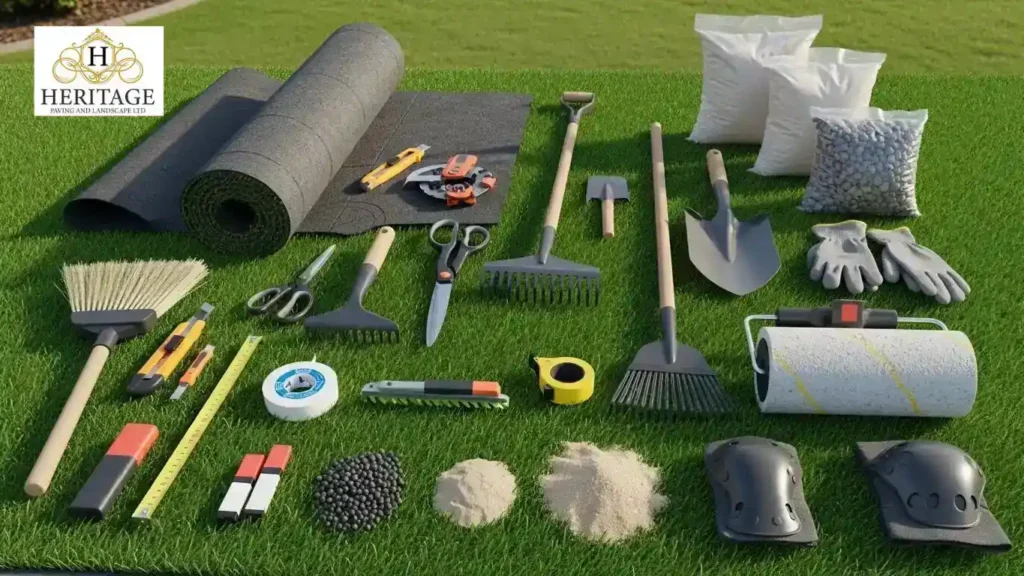
- Artificial grass rolls
- Artificial grass underlay
- Utility knife or sharp scissors
- Turf cutter or spade
- Rake and shovel
- Sand or crushed stone
- Joining tape and adhesive
- Lawn roller or heavy board
- Measuring tape and marker
- Broom or stiff brush
- Infill sand or rubber granules
- Gloves and knee pads
Having all these tools ready makes it easier to lay artificial grass smoothly and finish your garden neatly.
Step 1: Measure and Plan Your Area
Start by measuring your garden carefully. Draw a simple plan and mark any slopes, corners, or obstacles. This will help you work out how much fake grass for the garden you need. Buy a little extra to allow for trimming and adjustments.
Step 2: Remove Existing Grass and Soil
Remove all natural grass and the top layer of soil. Remove rocks, roots, and any other debris. For larger gardens, a turf cutter can make the job faster. Make sure the ground is level and free from lumps, as this will help with a smooth synthetic grass installation
Step 3: Prepare the Base
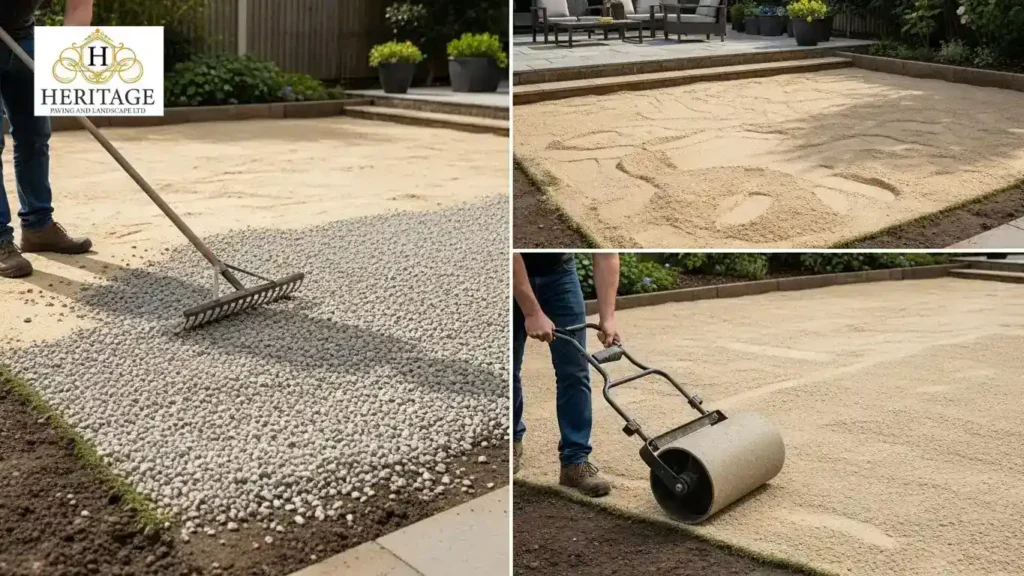
Spread a layer of crushed stone or sand evenly across the area. Use a rake to level it, then compact it firmly with a roller or heavy board. A strong, flat base is essential for a durable and even laying of synthetic grass, helping it stay smooth and long-lasting.
Step 4: Lay the Artificial Grass Underlay
Roll out the artificial grass underlay over the prepared base. Cut it to size so it fits the area neatly. Smooth it out by hand to remove any folds or bumps. A flat underlay helps with drainage and adds protection under the grass fibres, which improves comfort and overall finish.
Step 5: Roll Out the Artificial Grass
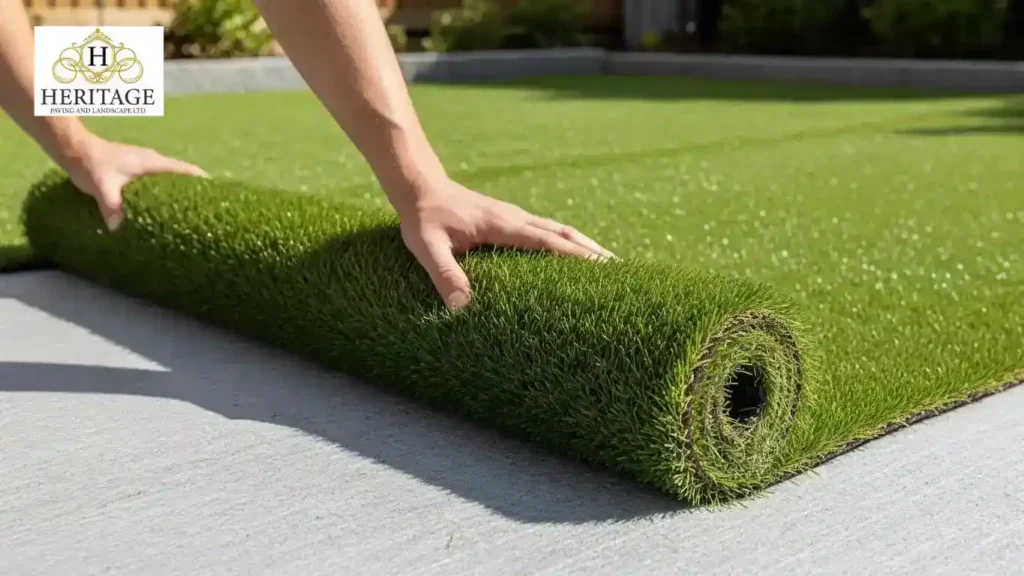
Unroll the artificial grass over the underlay and position it carefully. Leave it in place for a short time so any creases can relax. If you are using more than one roll, line up the edges closely. Keep the pieces flat and avoid overlapping to achieve a clean, seamless look.
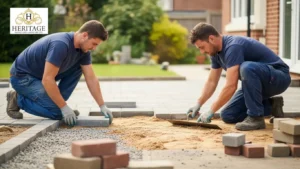
Step 6: Join Multiple Pieces
Place joining tape along the seam where the two pieces meet. Apply adhesive to the tape, then press the edges of the grass firmly into place. Check that the fibres run in the same direction on both pieces. This helps create clean joins and a neat fitting artificial grass finish.
Step 7: Trim the Edges
Trim the grass to fit neatly around curves, paths, and flower beds. Use a sharp utility knife and cut from the back for better control. Keep the edges tight against borders to avoid gaps. Clean cuts help the installation look tidy and professional.
Step 8: Secure the Grass
Secure the edges using landscape staples or nails, placing them about 20 to 30 cm apart. Press them in firmly along the perimeter and joins. This keeps the grass firmly in place and helps your artificial grass installation stay stable over time.
Step 9: Brush and Infill
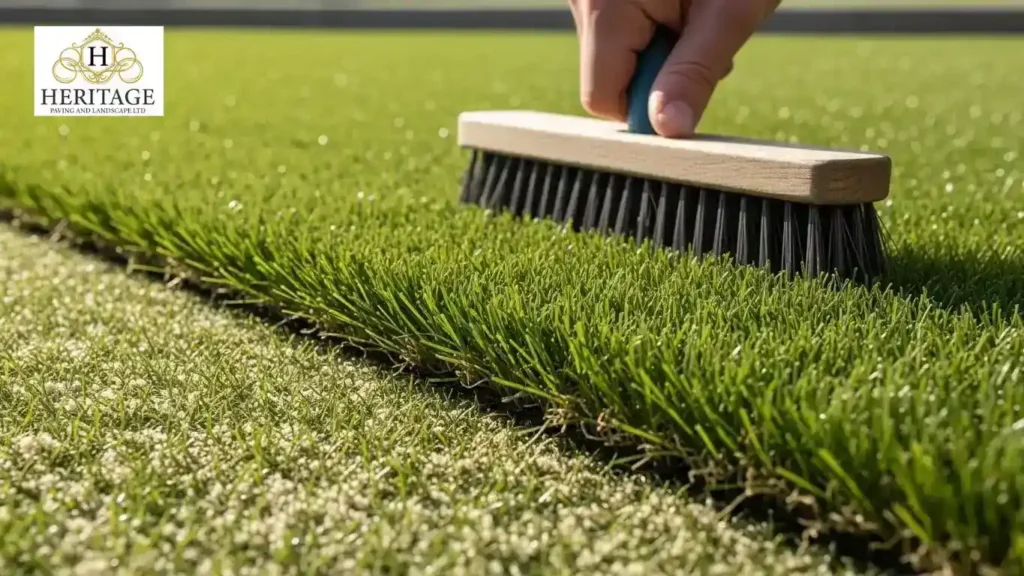
Use a stiff brush to lift the grass fibres upright. Brush against the grain to lift the fibres upright. Add infill sand if needed and spread it evenly across the surface. This adds weight, supports drainage, and improves the look and feel of your synthetic grass.
Step 10: Maintain Your Artificial Grass
Maintenance is easy. Regularly remove leaves, dirt, and debris. Rinse the grass with water from time to time to keep it clean. Check the edges and fixings to make sure everything stays in place. Simple care like this will help your artificial grass for the garden last for many years.
Extra Tips for a Smooth Installation
- Choose the right synthetic grass for the garden depending on how much foot traffic the area gets.
- Work in small sections to prevent wrinkles and make alignment easier.
- Keep some extra grass handy for future patching or repairs.
- Begin the installation on dry ground to make rolling, trimming, and fixing easier.
Common Mistakes to Avoid
- Not preparing the base properly can cause bumps or an uneven surface.
- Skipping the artificial grass underlay reduces comfort and drainage.
- Overlapping grass edges instead of joining them correctly.
- Ignoring the fibre direction, which makes the grass look unnatural.
- Using too few pins or staples can lead to movement or lifting.
- Installing on wet or soft soil, which can affect long-term stability.
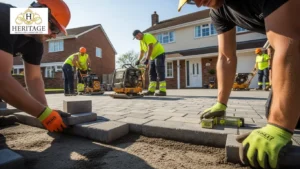
Why Hire a Professional for Artificial Grass?
Hiring a professional can make a big difference, especially for larger or complex gardens. Professionals have experience with artificial grass installation, so they know how to prepare the base, join rolls neatly, and fix edges securely.
Key benefits of hiring a professional:
- Faster installation: Experts complete the job quickly and efficiently.
- Accurate base preparation: A properly prepared base prevents bumps and uneven surfaces.
- Clean joins and edges: Professionals align fibres correctly and join pieces seamlessly.
- Reduced mistakes: Less risk of errors that could cost time and money later.
- Long-lasting results: Correct installation ensures your fake grass for the garden looks natural and lasts for years.
Looking for expert installation? Get in touch with Heritage Paving & Landscapes, your trusted artificial grass installer in Essex.
Conclusion
Artificial grass is an ideal choice for any outdoor space, keeping it green, tidy, and easy to maintain throughout the year. By following proper installation steps, from preparing the base to trimming and securing the edges, you can create a neat and long-lasting garden that looks natural and polished.
Deciding between DIY and professional installation depends on your garden size, layout, and comfort with tools. Small, simple areas are suitable for DIY, while larger or more complex spaces may benefit from expert support from a trusted paving company, ensuring proper groundwork and a clean, professional finish. If you have questions or need advice, you can Contact Us for support and tips to get the best results for your garden.
FAQs
1. How long does it take to install artificial grass?
Installation time depends on garden size and complexity. Small areas can take a day, while larger or uneven spaces may take several days.
2. How do I maintain artificial grass?
Keep it tidy by removing leaves and debris regularly. Rinse occasionally, brush the fibres upright, and top up infill when needed to maintain a natural look.
3. Can artificial grass be used in shady areas?
Yes, artificial grass works well in areas where natural grass struggles, including shaded spots. It stays green year-round and does not require sunlight to thrive.
4. Does artificial grass drain water effectively?
Yes, artificial grass usually has drainage holes or an underlay that lets water pass through, preventing puddles and waterlogging.